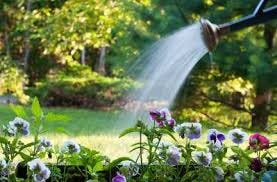
 Watering plants seems simple and uncomplicated. However there are some myths that mislead even the more experienced gardener. A sustainable landscape calls for installing the right plant in the right spot. Making a plant feel at home improves plant health and reduces the need to overuse a valuable natural resource: water. When choosing plants, first evaluate your existing conditions and read plant labels. If plants like wet feet, you’ll want to put these in areas that tend to have damp soils like near streams, springs or water features and fountains. If you have dry shade, then look for plants that like those conditions. However, if you’ve inherited an existing landscape or experience drought, unusual heat or drying winds, additional irrigation or hand watering may be necessary. Whether you're taking care of an established garden or installing new plants, you’ll benefit from these guidelines and myth debunking tips. 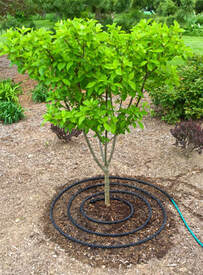 While the general rule of thumb is about an inch or two of water each week with deep, infrequent watering as opposed to the more frequent shallow watering, this really depends on a number of factors. First, consider your soil. Sandy soil is going to hold less water than heavier clay soil. Therefore, it’s going to dry out faster while the clay-like soil will hold moisture longer (and is more susceptible to overwatering). For clay soils (Western PA,) avoid daily light sprinklings, which encourage roots to grow near the soil surface where they're vulnerable to drying out. Apply water slowly so it's absorbed by the soil rather than running off — a soaker hose is ideal. Another advantage of a soaker hose is that you don’t have to stand and direct the spray. This is why amending the soil with compost is so important. Healthier soil drains better but allows for some water retention too. Applying mulch is also a good idea, reducing watering needs. Weather conditions determine when to water garden plants as well. If it is hot, windy, and/or dry you’ll have to water more often. Of course, in rainy conditions, little watering is needed. Plants, too, dictate when and how often to water. When a plant is first installed, it requires regular watering until it acclimates to it’s new home. (Read on to later in this blog) 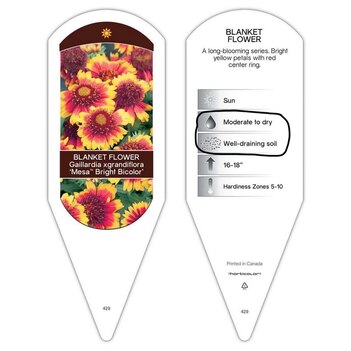 Different plants have different watering needs. Be sure to read water recommendations and growing conditions on labels or reputable website sources. If plants like wet feet and they are planted in a dry soil, they will need more irrigation. Some plants like hydrangea, astilbe and hosta are sensitive to heat and may need more water during hot and windy weather. Vegetables, bedding plants and many perennials have more shallow roots systems and also require more frequent watering, some daily–especially in temps over 85 F. (29 C.). Most container plants need watering on a daily basis in hot, dry conditions — sometimes twice or even three times a day. The best way to water most plants is by applying enough to moisten the plant's entire root system, and then letting the soil dry out slightly before watering again. When to Water: Time of day is key. The most suitable time for watering is morning, which reduces evaporation. But late afternoon is okay as well provided you keep the foliage from getting wet, which can lead to fungal issues. Wilting is a sign that the leaves aren't getting enough moisture, but that doesn't necessarily mean that the soil is dry. Anything that damages plant roots can cause wilting. 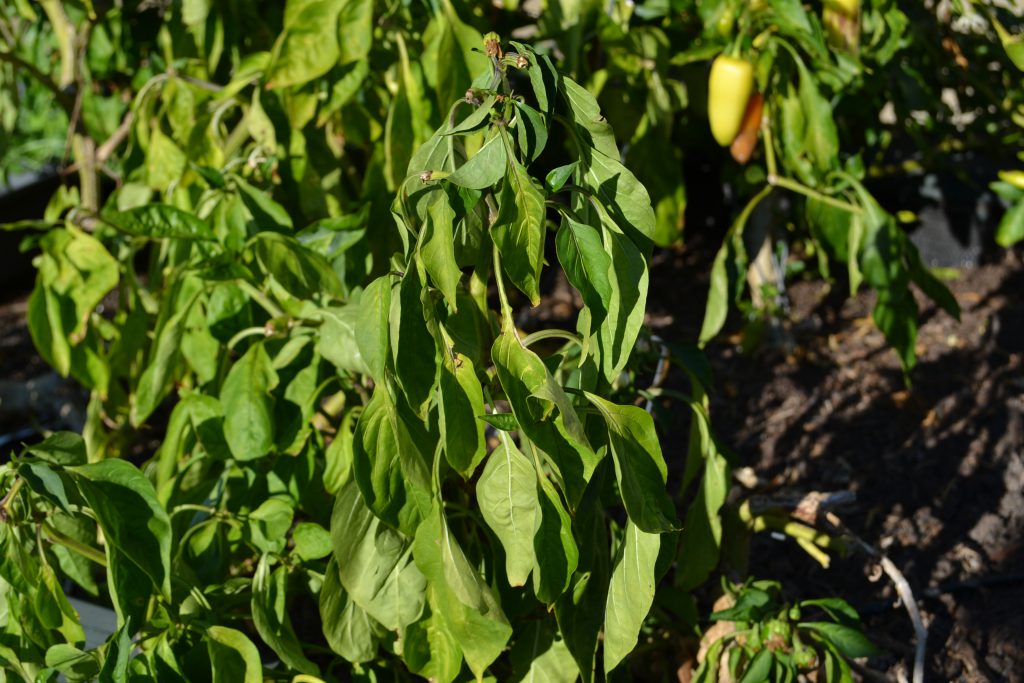 Plant roots need a fairly constant supply of both air and water. Too little water and the roots die from lack of moisture. Too much water and the spaces between soil particles remain filled with water, suffocating roots. Both situations reduce a plant's ability to deliver enough water to stems and leaves, resulting in wilting. A good example of this is an outdoor pot with inadequate drainage holes -- after a week of heavy rain, the plant’s roots become waterlogged. Root diseases, physical damage (such as disturbing roots while you're hoeing) and soil-borne insects can also harm roots to the point that they can't fully hydrate the plant. Damage to stems can also cause wilting. Some diseases and insects (especially borers) prevent water distribution throughout the plant, causing some or all of it to wilt. The only way to tell if lack of water is causing wilting is to check soil moisture. How To Water The myth that water droplets act like tiny magnifying glasses and burn plant leaves has no basis in fact. There are good reasons to avoid watering your garden on a sunny afternoon, but causing scorched leaves isn't one of them. Anyone who has watched the sun come out after a summer shower knows that the water quickly evaporates. Try to avoid watering on sunny afternoons to minimize the amount of moisture lost to evaporation, but don't worry about leaf scorch. Overhead watering isn't the most efficient from a water conservation standpoint, but there are times when it's called for. It's usually best to apply water directly to the soil around plants rather than watering with a sprinkler. Less water is lost to evaporation, especially on hot, sunny days. Foliage stays dry, minimizing disease problems. But there are times when an overhead shower is called for. During dry, windy weather, a fine layer of dust can build up on leaves, reducing the plants' ability to photosynthesize efficiently. Another case is if plants are infested with insects, such as aphids and spider mites. Simply hosing them off plants can keep them in check. Gardeners who want to avoid spraying chemicals prefer this method. Finally, heat-stressed plants that have wilted even though their roots are moist can benefit from a cooling shower — the effect won't last long on a sunny day but it may provide some relief. Even drought tolerant plants need watering. Many young plants have perished because these drought tolerant plants didn't get sufficient water at installation time and during their first season of growth. When you set out a new container-grown plant, the roots are confined to the shape of the pot. The plants need a consistent supply of water during their first growing season, until their roots grow out into the surrounding soil. Water them as you would your annual flowers in their first season. During their second and subsequent growing seasons, drought-tolerant plants may need supplemental water only during extended dry spells. Note, however, that just because a plant is drought-tolerant doesn't mean it won’t fare better with a regular supply of moisture. Watering in Newly Installed Plants (Courtesy Penn State Extension—Advice for PA residents) Newly installed landscape plants have a unique set of needs. Unlike established flowers, shrubs and trees, new plants experience an adjustment when transferred from container to the ground. To help plants get a good start in your garden, follow these tips from the Penn State Cooperative Extension. If you live in another region, check out your state extension’s planting guidelines. Perennials Soak the plants immediately after planting and check regularly to prevent drying out. Less frequent but deep watering encourages perennials to root deeply. Perennials that are said to tolerate drought are drought tolerant only after they have become established. The addition of mulch will help to reduce the need for frequent watering. 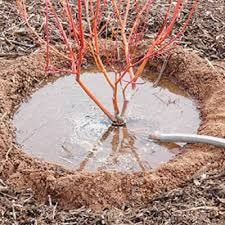 Shrubs and Trees Water the plant weekly during the first year, except during weeks when it rains enough to wet the top six inches of soil. When you water, be sure to soak the soil by allowing a hose to trickle slowly at the base of the plant and at the edges of the backfill soil. Move the hose around a tree or shrub bed to assure uniform water application. Avoid shallow, frequent watering because it will encourage the growth of shallow surface roots, which will be vulnerable to drying out. Be careful not to overwater. Frequent saturation of the surrounding soil in poor drainage areas could smother the root system. Water only when the soil under the surface is dry to the touch. Continue to monitor new trees for drought stress into their third season. They may suffer from insufficient water even when other established plants in the landscape are thriving. Water is a precious natural resource that we don’t want to waste. And unless it comes from the sky, it isn’t free. Start by finding out what your plant needs to grow and thrive. Keep an envelope with the original plant tags, or make notes in your journal. After planting the new specimen in the ideal spot, soak it thoroughly and check soil moisture regularly to help it adjust to it’s new home. And follow our guidelines for optimal watering. Your thirsty plants will thank you. 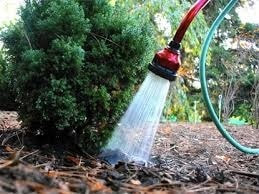 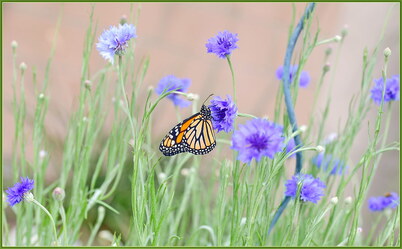 Don’t let the winter blues get you down. Spring will be here soon. Take advantage of these last few weeks of hibernation to consider getting a head start so you can hit the ground running. The theme of a winter garden to-do list is anticipation. While you hum the Carly Simon ballad, dream up a crop of fresh gardening goals. Research new plants you’d like to try this year. Below are some ideas to motivate your spring planning.  Swap Plants. If you have plants that are ready for dividing, consider sharing. Get together or video chat with some gardening friends and organize a plant exchange for spring. Think about what plants need dividing and coordinate with your group on who, what, where and when you’ll host a garden swap. This article from Homestead Brooklyn has some great planning tips: How to Organize a Plant Swap Like a Pro. 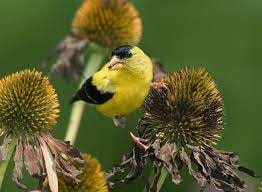 Plan a low-effort garden. If you’ve got a busy summer planned, consider planting pots in self watering containers (available online and garden centers) and plan your drought tolerant containers. Window boxes, which can be difficult to water, benefit from self- watering window boxes. Swallowtail Garden Seeds is an informative resource with pictures for drought tolerant plant ideas. 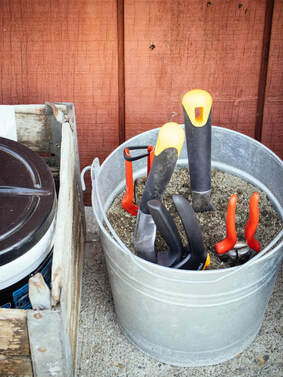 Image: Gardening Betty Take inventory of your tools. Buy any tools you need so you’re prepared when spring arrives. Care for your tools by cleaning and sharpening them. Create a cleaning station for your hand tools for the growing season. Sanitizing pruning shears prevents the spread of disease between plants. Garden Betty has an informative blog on making a DIY tool cleaning station. 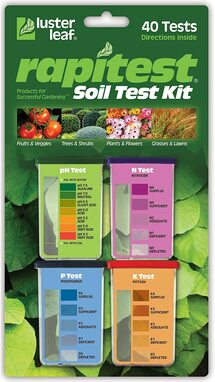 Get Healthy. Get soil healthy by taking a soil test. Purchase it from a hardware store or your local extension office. Now is the time to start the testing process so that you have results in time to amend your soil in the spring.  Start composting with worms. A great approach to recycling and producing natural fertilizer is vermiculture. It takes about one year to reap the benefits. If done correctly there is little to no smell and no rodents. For more information read this article called: Worm Composting Basics for Beginners. 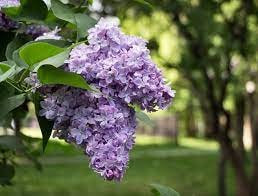 Create Buzz: Help your garden and local farmers by attracting and supporting pollinators. Use the early spring to evaluate your yard and determine how you can create an environment that attracts pollinators. Bees, bats, hummingbirds, butterflies and more are needed for a healthy environment. This beautifully illustrated guide by the US Fish and Wildlife Service is worth the download.  Incorporate Native Plants: Commit to planting one native plant. Native plants support local wildlife, thrive in your environment and therefore require less care and chemicals. Native plants adapt to our local climate and conditions, provide food for native animals and insects, support native pollinators, are low maintenance and support biodiversity. The DCNR provides native plant lists for your area. PA natives are listed on DCNR website. 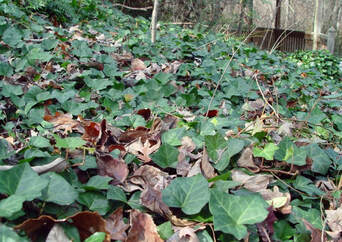 Photo by Chris Evans, Illinois Wildlife Action Plan, Bugwood.org Purge: Eliminate at least one invasive plant in your yard. Non-native invasive plants become established in the wild and prevent native plants from growing. Many people have invasives in their yard and don’t realize it. These invasives don’t support the local flora and fauna. Eliminating an invasive plant once and for all saves you time from weeding out new shoots, and gives your other plants a fighting chance. Even though it is hard to justify ridding your yard of a thriving plant, you’ll support our woodlands and wildlife by eliminating invasive plants like: burning bush, Japanese barberry, Japanese honeysuckle, and tree of heaven. The Smithsonian lists the top six invasive plants in the United States on their insider website. For the most extensive list of invasive plants specific to where you live, contact your county extension office. Winter makes the arrival of warm breezes and spring blossoms a sweet ending to the cool season. As you anticipate the thaw, commit to game-changing, practical steps to maintaining a healthy landscape.   Image: NJ Dept. of Ag. A Bad Bug Author: Holly Schultz Let me start this little blog by sharing that I seem to have reached the age that I no longer care about what people think of my behavior, specifically playing Whack-A-Bug in my neighborhood! Armed with an old garden trowel and gloves, I took advantage of a beautiful fall afternoon to make a dent in the infestation of red maples on my street. Where we live in Pittsburgh, the Spotted Lanternfly has settled in and taken residence in both urban, suburban, and rural trees. You may have read or heard about these unwelcome insects. I certainly don’t want these invasive insects to harm the gorgeous trees in our region. Nor do I want farmers to suffer crop damage. So, when I learned that we can help curb the spread of the Spotted Lanternfly by stomping on them, I started looking for them on my daily walks with my dog. I found more than I expected. Here are answers to some common questions. What is it? What does it look like? 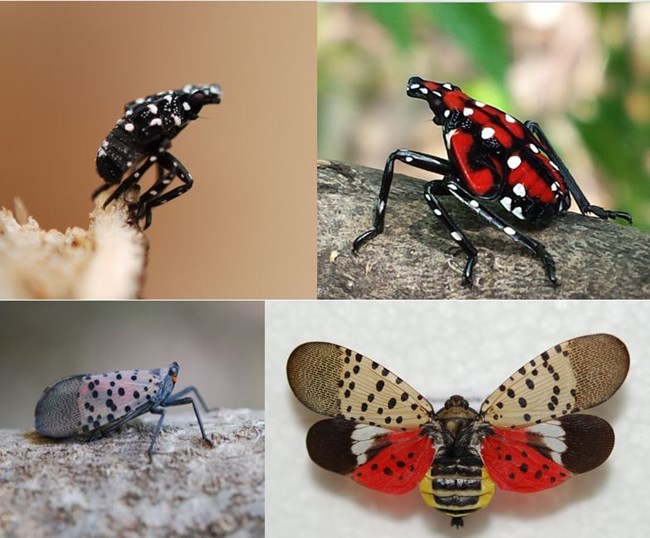 The adult is approximately 1-inch long and .5-inch wide. The forewing is grey with black spots and the wingtips are reticulated black blocks outlined in gray. The hindwings have contrasting bands of red and black with a white band. The legs and head are black; the abdomen is yellow with broad bands. Immature stages (nymphs) are black with white spots, and develop white patches as they grow. Mother Nature has provided them with highly effective camouflage. Their outer wings are the exact color of tree bark, so you really need to be looking hard to find one. If one has fallen from a tree, it’s wings may have spread, revealing the bright red hindwings. They can jump and fly. They do not sting or bite. Why is it harmful? The Spotted Lanternfly (SLF) is an invasive species originating from Asia, and was first found in the eastern part of Pennsylvania in 2014. Scientists believe the SLF spread west by hitching rides on vehicles and their cargo. Now 46 counties in PA have been affected to the point of being quarantined for the SLF (11 of this total were added in 2022.) Public Nuisance: swarming, excreting honeydew, which is partially digested tree sap containing sugars. This attracts bees and also allows black mold to develop on trees, decks, and outdoor surfaces. Carcasses emit an unpleasant odor. Damage: The SLF can be especially harmful to young saplings or trees already stressed with other diseases. A more mature tree in good health will be less likely to suffer. In addition to their attraction to the Tree of Heaven, the SLF appears to be attracted to the sap from the leaves of Red Maple, Silver Maple, River Birch, Willow and the London Plane tree. Nymphs will feed on tender stalks of perennials and tree leaves. Adults feed voraciously on tree sap, causing branch dieback and reducing energy storage for the winter. The potential harm to a tree depends on the age of the tree as well as other existing stressors (insects, diseases, or site-related or environmental conditions.) In the state of Pennsylvania, the agricultural sector is a driving force of our economy. Scientists report that the SLF invasion is causing considerable damage to crops and hardwood trees. What should I do if I see one? Report it to the USDA or the PA Dept. of Agriculture on their websites or by calling 1-888-4BADFLY in PA. Then, kill it, squash it, smash it! Mechanical methods are always recommended as the first option. I found it easy to kill a few on my walk by using a garden trowel to smash them. Just today, I found and smashed at least 20 SLF on red maples on my street. A few were out of reach on higher branches. You can spray for them. Contact vs. systemic spraying. Contact spraying will kill the SLF within hours as their body absorbs the substance, whether it be an insecticide, a soap or an oil. Systemic spraying is a method of spraying the tree or plant; the substance stays in the plant and kills the SLF as it feeds off the leaves of the tree/plant. Research has indicated that the most effective insecticides that protect trees from the SLF contain either imidacloprid or dinotefuran. Handmade circle traps can be effective, but only at certain times of the year. Contact the Penn State University Extension office for more details. What should I do if I notice a large cluster on a tree? 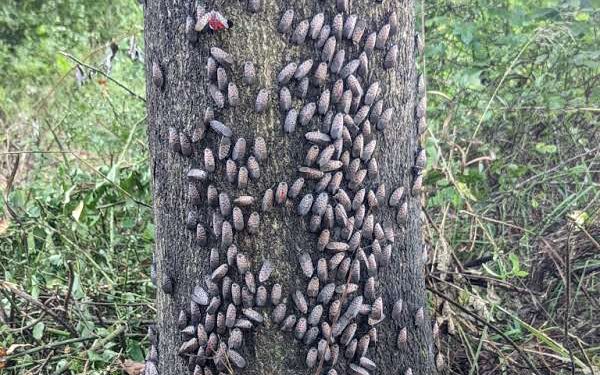 Should be removed by vacuuming with a shop vac, scraping into a thick gallon Ziplock bag, or spraying with an insecticide. Always use the least amount of insecticide and always read product label carefully. Avoid spraying near blooming pollinators. Wear gloves and eye protection. In the case of a large infestation, call a tree professional. What does their egg mass look like and where should I look for them?  Image: PennState Extension The mass appears as a light gray/brownish covering resembling mud. Newly laid eggs can be shiny with a waxy coating. Older egg masses will lose their covering and appear as 4-7 columns of seed-like eggs, of 30-50 eggs in total. Egg masses should be scraped off a tree or plant into a container of alcohol, then disposed. Why should I take the time to report a sighting? In order to attempt to contain and control the spread of the SLF, the Department of Agriculture wants up-to-date data from residents when SLF are found. The Commonwealth determines which counties need to be placed under quarantine based on the metrics. Is there an economic impact to our state’s economy? Currently, the economic impact in the Commonwealth of Pennsylvania is $42.6 million. It has been estimated that economic impact in PA could be in the hundreds of millions of dollars in damage and loss due to grapes, apples, hops and hardwood. Job losses in farming and logging will also be an unfortunate result of the SLF invasion in PA. Keep an eye out for the SPL as you enjoy the crisp temps and colors of autumn.  Resources and Refrences
PA Dept. of Ag: www.agriculture.pa.gov/Plants_Land_Water/PlantIndustry/Entolmology/spotted_lanternfly/Pages/ USDA www.aphis.usda.gov/aphis/resources/pests-diseases/hungry-pests/slf/spotted-lanternfly Penn State University Extension Office: https://extension.psu.edu/spotted-lanternfly An outdoor fire warms an outdoor space and draws people in to relax. However, fire pits in urban and suburban landscapes can present dangers if the sparks land on structures and catch fire. Fire pits also create acrid smoke, which irritates eyes and lungs for everyone exposed, especially people with asthma or other breathing difficulties. A more environmentally friendly alternative is smokeless fire pits. With little to no smoke, fewer harmful particulates are being released into the atmosphere. Smokeless fire pits have gained a lot of momentum over the last few years. This blog reviews their features and installation considerations.
Features to consider Portability, ease of lighting the fuel, durability, assembly, quantity of wood needed to maintain high heat, weight, material, carrying handles, types of fuel: coal, propane, wood or pellets. Some pits are easy to light and others require a specific quantity of fuel prior to lighting to create the heat needed to be smokeless. Consider how you plan to use the fire pit. If you want to grill, you will want to choose one that can use wood and coal. Keep in mind how much space is available for storing wood and pellets as well as your budget for purchasing fuel. Some pits are painted and may become discolored over time. Read reviews and decide if this affects your choice. If your pit is surrounded by stone or pre-fabricated stone, this may not be an issue. Where to use Since high heat makes the fuel smokeless, it means the metal gets extremely hot. The benefit is that it creates a warm, cozy spot for gathering. But, keep in mind that the intense heat may melt or damage certain patio and deck materials, as well as home siding. Just like a standard campfire, a smokeless fire pit poses serious burn risks, especially for children and pets. If there are kids or pets around any fire pit, there should always be adult supervision. If this is a particular concern, you might look for a model with a protective 360 degree enclosure, such as the Solo Stove Surround. Some fire pits are light and portable with handles so they can be taken to campgrounds, tailgates and picnics. If you don’t plan to move the fire pit, a stone or pre-fab interlocking paver helps tie it into your outdoor space and secure it in the wind. Portability Look at size and weight. A 15- inch is a reasonably portable size for a smokeless pit. Foldable fire pits are easier to move and transport. Larger ones are for a more permanent solution. Just be sure to purchase an appropriate weather cover, handles and/or carrying case. Accessories Cover: protection from outdoor elements. Grilling: Swing away grill and tong stand, sear plate Screen / shield: For sparks Heat deflector: maximizes hot airflow Removable Ash Pan: Makes clean up easier Carrying Case / handles: For making fire pit portable Lid: Contains leftover ash and embers as an overnight safeguard Stand: For use on decks, grass and turf Smokeless fire pits offer a cleaner-burning experience, without the tear-inducing smoke of a traditional wood-burning campfire. As they grow in popularity, new brands will likely emerge on the market. Think about which features best meet your specific needs before making your choice.
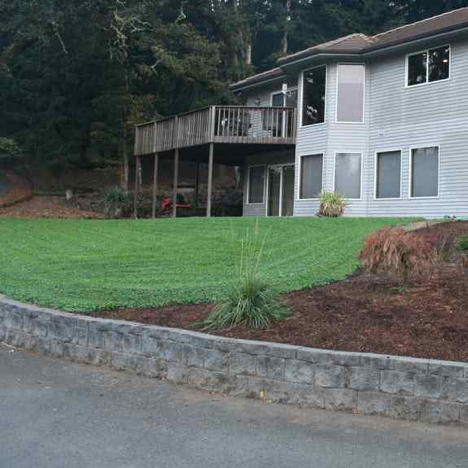
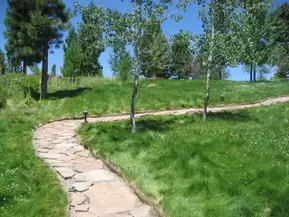
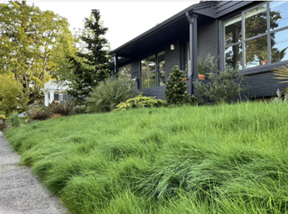
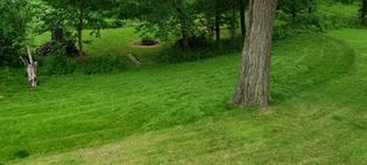
 Manicured lawns cover millions of acres in America. No-mow lawns are challenging this conformity. They are better for the environment because they require less water and fertilizer. Traditional lawns are very thirsty and hungry, requiring irrigation and fertilizer. It may take years for communities to broaden their definition of green space. Before you decide to tear out your grass, find out if your community or neighborhood has ordinances defining what can be planted in your yard. No-mow yards fall into four categories: 1. Naturalized grass that is left to grow wild 2. Low- growing turf grasses that require little grooming (blend of fescues) 3. Native or naturalized landscapes where turf is replaced with native and noninvasive grasses 4. Clover lawns This blog will focus on fescue no-mow and clover lawns. Any lawn can be a no-mow lawn if you just don’t mow it, but you will end up with just as many weeds if you don’t use the right seed combination. No-mow grass is a blend of hardy fescue and fine fescues designed to create a lush green lawn that is essentially weed-free (once the grass matures.) Fescue is a cool season grass that thrives in sun but can tolerate partial shade and grows in most parts of the United States except zones 8-10. Drought-tolerant strains of fescue prefer sandy, loamy soil and requires little or no fertilizer. No-mow blends differ according to regional growing conditions, but most contain five types of fescue: hard, sheep, chewing, red and creeping red. These work together to create a dense, green lawn that requires just a spring and fall mowing. Fescue isn’t the only no-mow alternative. In the south, Buffalograss and Zoysia offer drought-tolerant choices. An alternative being featured on TV home improvement shows are clover mixes. Clover lawns are easy to start and maintain. Popular clover lawns are planted with Micro Clover (trifolium repent var pipolina). It is a type of Dutch white clover which doesn’t clump as much as others. Clover lawns fill out bare lawn patches, support biodiversity, requires no chemicals and little water. However if you don’t like bees, this may not be the lawn for you. Additionally, if you live where deer frequently browse, the clover will not only attract them, but may not be able to recover from the heavy feeding of a few hungry deer. Courtyard and protected urban lawns are great candidates for clover lawns.
If you want to reduce the time you spend caring for your grass, including mowing, fertilizing, treating dandelions, grubs and moles, and watering, you might want to consider an alternative to growing traditional grass. Clearly, clover and fescue may not be an option if local ordinances don’t allow for them. But it would be worth a call to see if your community would permit planting clover or fescue on the perimeter of your yard, such as a transition to a wooded area. And if you are free to plant what you want, give clover or fescue a try. The savings on water and chemicals would benefit the household budget and the environment.
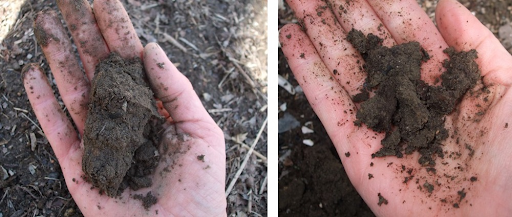
 It is not too early to plant trees, shrubs and perennials, but you’ll need to do a few things to prevent them from heaving out of the ground. Annuals and annual seeds, seedlings started inside and tender vegetables should not be planted until the soil is warm and all chance of frost has passed. Last frost dates depend on your growing zone. Soil As long as soil is not frozen or too soggy, it is safe to plant trees, shrubs and dormant perennials. If perennials are in pots smaller than 4”, you’ll want to wait until all chance of deep freezing is over. Freeze - thaw cycles can heave small plants out of the ground. Here’s one way to check if the soil is dry enough to plant: form a small handful of soil into a ball. Press a finger on the ball and if it breaks apart, then the soil is ready to plant. If the soil sticks together, it needs to dry out more before planting. Squeeze Test can determine moisture level as well as type of soil.
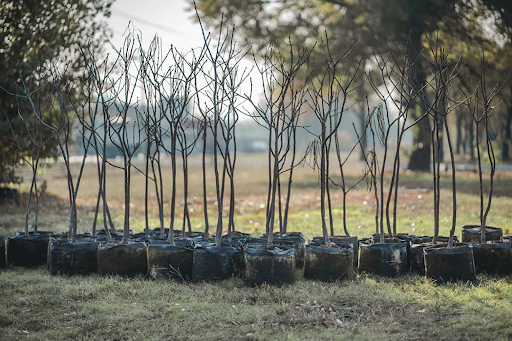
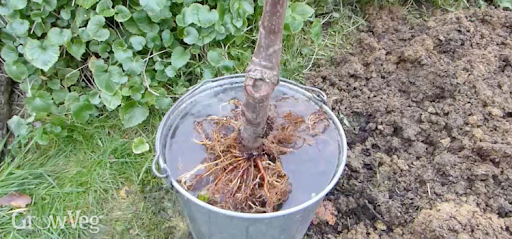
Plant Growth Purchase plants locally that are in a similar stage of growth as established plants in your region. These plants can be bought locally or through reputable online nurseries. Plants from greenhouses or those started indoors at home, and from warmer regions will be damaged by cold outdoor temperatures. It is fine to install dormant and bare root plants, including perennials. As a reminder, when a plant is dormant, it is in its’ natural state of rest. It’s part of a plant’s life cycle, when a plant stores energy and nutrients for its next cycle of growth. Prep and care Keep pots in a protected, cool place where they will not freeze. Soak roots and prune only broken roots and branches. Do not let the roots completely dry out. Soak the roots until they look hydrated and are somewhat pliable. For plants in soil, moisten soil in pot until fully saturated. Apply about an inch of mulch for perennials and two inches for trees and shrubs.
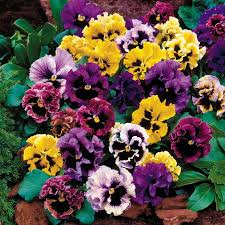
Annuals extension.sdstate.edu/cool-season-flowering-annuals-gardenCool season annuals are safe to plant in early spring. Pansies, primulas and ornamental cabbage can tolerate light frosts and temps into the low 30s. Temps in the 20s can damage cold season annuals. With Spring only weeks away, the excitement we gardeners feel is almost “primal.” Do you agree? As the days grow ever-so-slowly longer and warmer, we seek out subtle signs that Earth will awaken from it’s dark Winter. We’ve had many months to evaluate our garden spaces, establish goals, make lists of desired plants and seeds, clean and sharpen garden tools, and read any and every article/book on growing plants that we love. If your plans include the addition of trees, shrubs, or perennials, you can follow our guidelines for early Spring planting. Be mindful to install plants in a similar stage of growth as the plants in your region. That will ensure your new purchases will do well with the seasonal temperature swings.
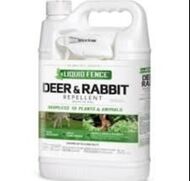
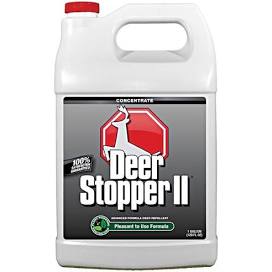
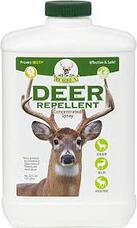
If you need assistance in selecting plants or design, we'd be happy to help! Rescue Your Plantings from Deer Browsing: Deer Resistant Annuals and Deer Repellent Spray (recipes)3/14/2023
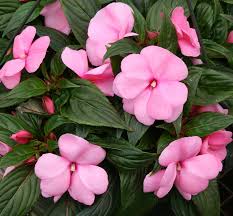
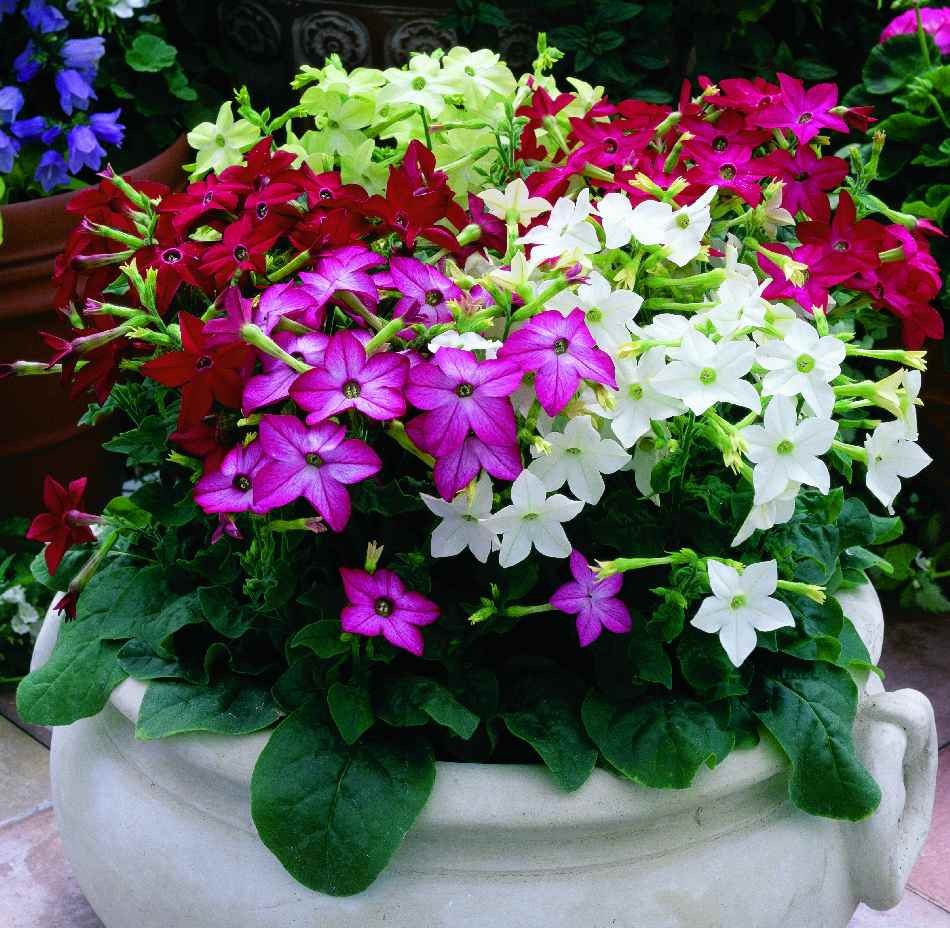
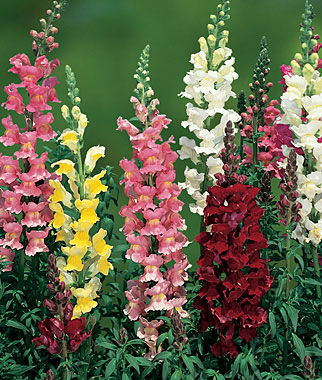
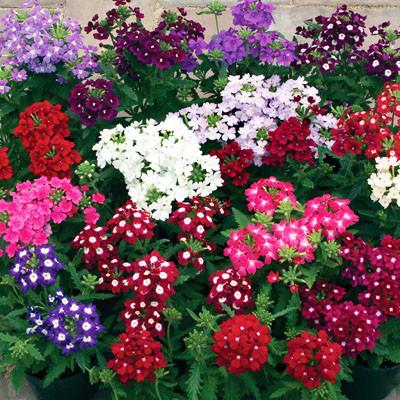
 Planting annual beds in the spring is the highlight of a gardener’s year. After a cold and brown winter, it is a relief to experience the April green-up, and also the pastel showy blossoms of flowering trees. Annual planting is the gardener’s reward for patiently awaiting winter’s end. You take the steps to create a landscape design, scour plant material at greenhouses, and create gardens with meticulous care. After all of your efforts are complete, you awaken to discover that ...your precious flower bed became a snack! Spring is not only your favorite time of year… it’s also a deer’s favorite time as well! After eating nothing but twigs and dead grasses all winter, there’s nothing they love more than getting a mouthful of your tender and tasty flowers! The answer? Deer resistant plant material and deer spray. Why are they “deer resistant”? Certain annuals naturally repel critters because their textures are unpleasant in a deer’s mouth. Other plants have a bad smell or taste - and can even be poisonous. I’m at the store and found a plant I love… will deer eat it? It’s always a good idea to visit a greenhouse with a plan. When you encounter a new cultivar you really love, get some information from the plant marker. Besides light requirements and spacing suggestions, the label may indicate if the plant is deer-resistant. If it doesn’t say, here are some ways to see if a plant will be ignored by hungry deer:
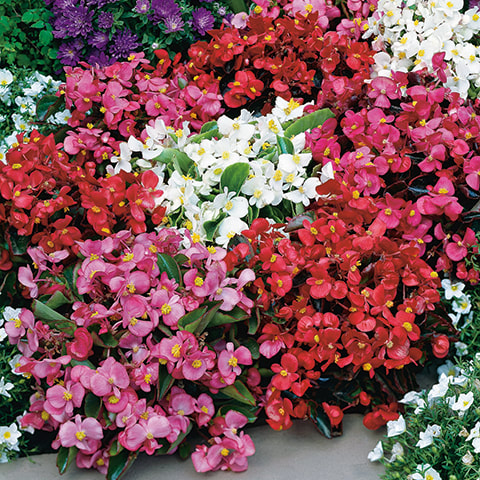
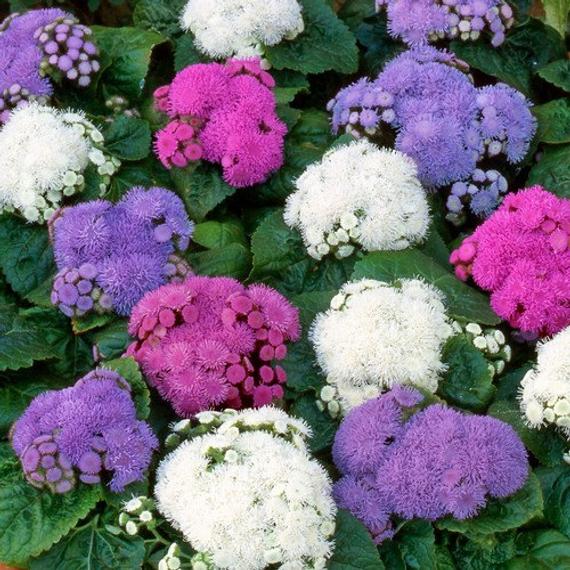
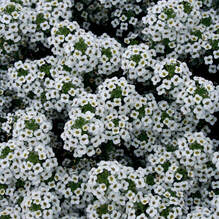
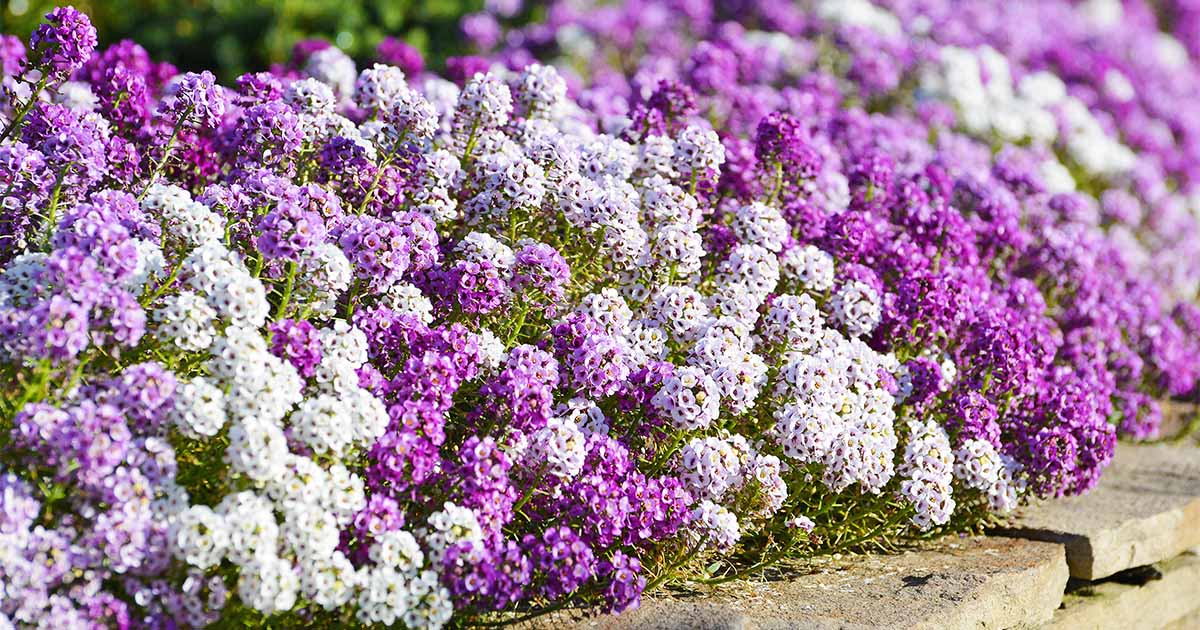
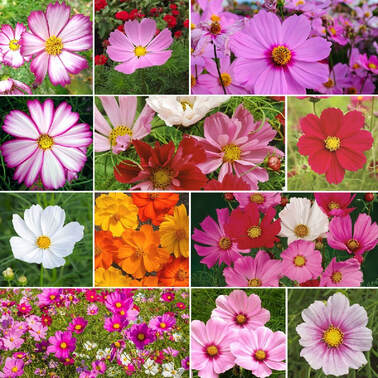
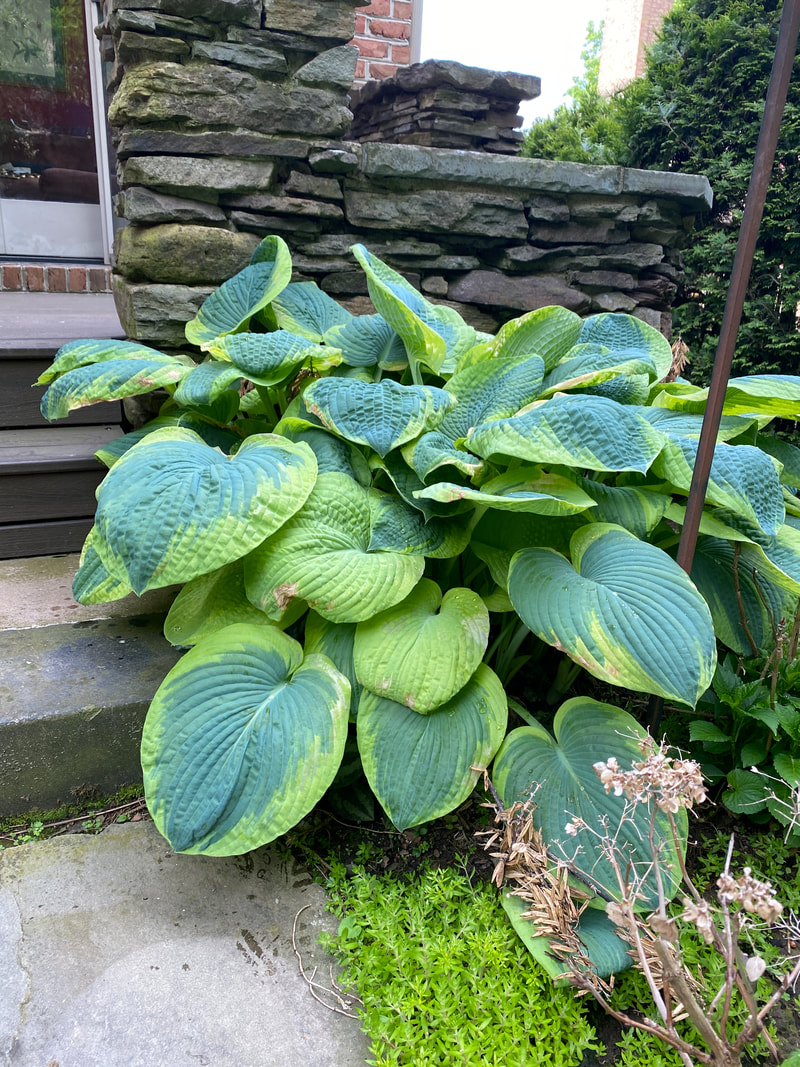
Fun fact…. Hosta and Hydrangea are two of deer's best-loved foods. These perennials will draw deer in and keep them coming back. If you have deer, either replace these plants with resistant annuals, perennials and shrubbery, or spray repellent to protect them. Annuals to Avoid Annuals to Plant Partial Shade and Full Shade  Coleus Partial Shade 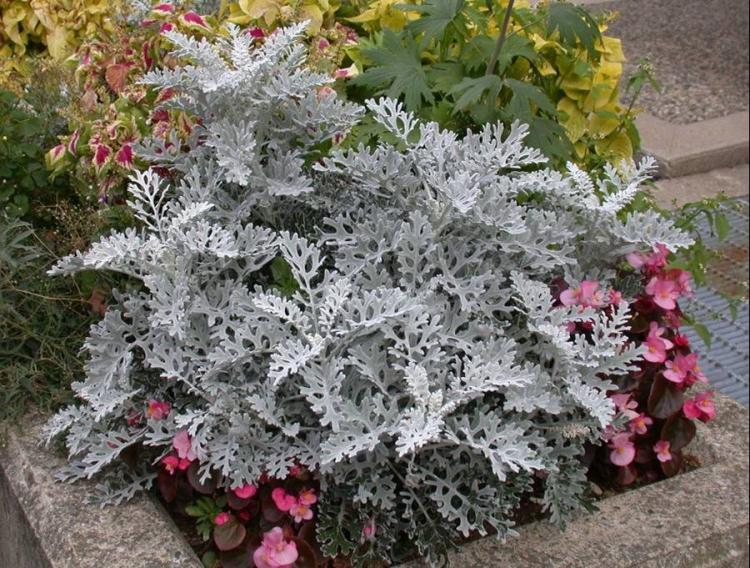 Dusty MIller Partial Shade to Full Sun
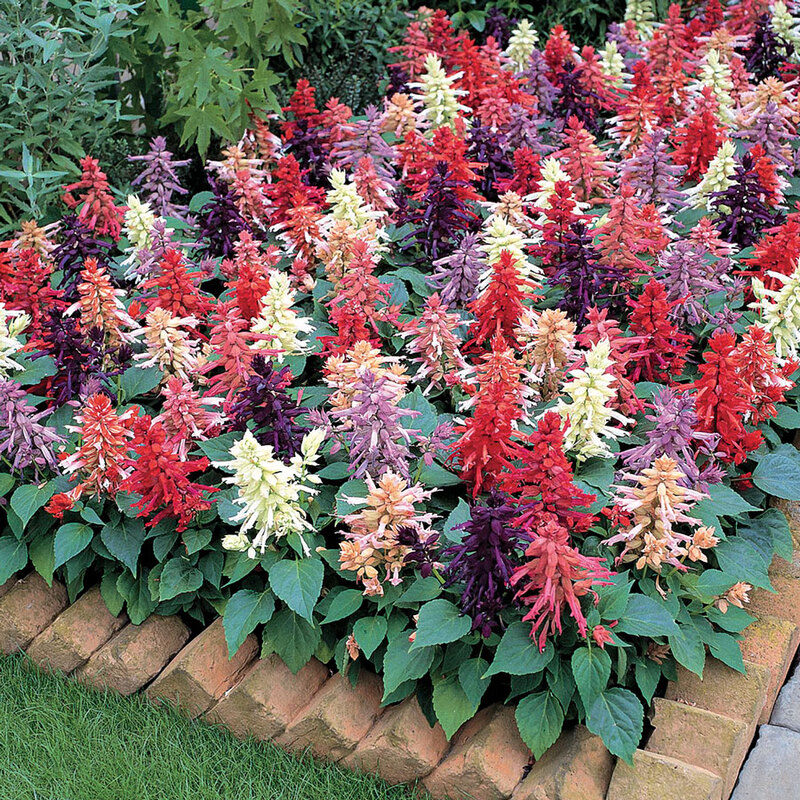
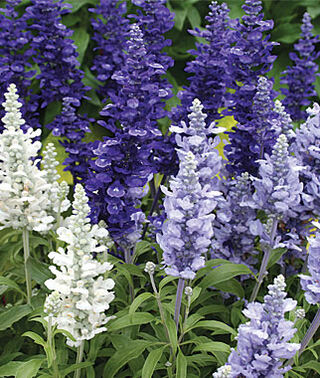
Full Sun Salvia
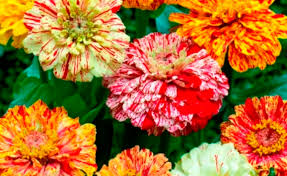
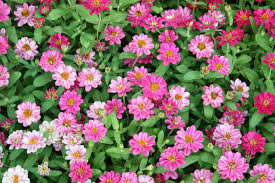
Zinnia
The knowledgeable gardener can certainly take measures to prevent deer browsing and enjoy colorful and beautiful gardens by combining deer deterrent sprays and using select plants in the landscape. Replacing plants and shrubs which deer prefer with those they will ignore will take time, money and effort. But the result will be a sustainable garden minus the frustration with local wildlife. Another growing season has come and gone, and it is time to prepare your garden for winter. Spending just a little time in the garden this fall will make for a healthy and happy spring garden. 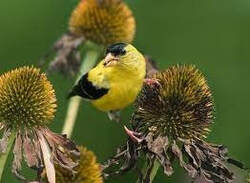 Perennials The first task most gardeners consider when preparing the garden for winter is cutting back perennials. While cutting everything to the ground may give the garden a tidy look, it does a disservice to wildlife species that can make use of some plants in the winter. Leaving perennial seed heads provides natural foraging habitat for native wildlife. In the winter months when food is scarce, gardens full of withered fruit and dried seed heads can provide birds with a reliable food source. Seed-eating songbirds such as finches, sparrows, chickadees, juncos, and jays will make use of many common garden plants. When cleaning up the garden, prioritize removing and discarding diseased top growth, but leave healthy seed heads standing. Many perennials lose all of their top growth, but when you cut the brown or yellow stalks, you will find green, lush, healthy growth at the base of the plant. Leave the ground hugging green leaves. Examples of these types of perennials are Oenothera, Salvias, Penstemons, and Scabiosas. Flowering Shrubs
Shrubs that bloom on old wood (current year’s wood) are typically summer and fall bloomers. Even though it may not hurt them to be prune in the fall, I usually wait to do so until spring for more winter structure in the garden. An exception to this rule are lavender, caryopteris and buddleias (butterfly bushes). These plants should be left alone in the fall. Hydrangeas are a complex category. See our blog on pruning hydrangeas.  Evergreens Do not prune evergreens in late summer or early fall. It may promote new growth that will not have time to harden off before first frost. Tender new foliage will be brown and unattractive in winter. 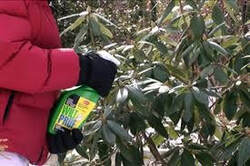 Anti Desiccant Sprays If your roses or broadleaf evergreens, like rhododendrons, are in an exposed spot, or if you have recently transplanted them, it is wise to spray them in late fall with Wiltpruf, an anti-desiccant spray made from pine sap. This will keep the plants from losing valuable moisture in the cold drying winter winds. Be sure your broadleaf evergreens begin winter well watered as an added extra protective measure. 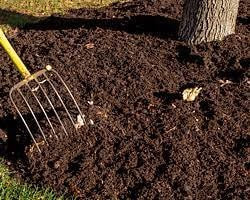 Mulching There are two different mulching chores in the fall.
Enjoy the fall colors, cool crisp air and those last warm days to put your garden to rest for the winter. A few hours in the garden this fall will reap healthy, happy plants in the spring.
 You've probably seen newspaper ads and attention-getting banners displayed at local nurseries and garden centers proclaiming, "Fall is for Planting." But is it really wise to plant grass, bulbs, trees and shrubs at the end of a growing season and so close to winter? The answer to this question is a qualified yes. Fall planting can be successful as long as the planting season is not extended too late into the fall, if difficult-to-establish species are avoided, and if proper care (watering, mulching, staking if needed, etc.) is administered after planting. Fall is the time to plant, divide and transplant:
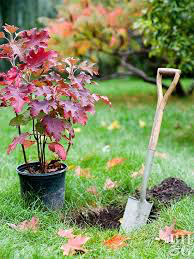 Trees & Shrubs For good reason, most people think of spring as the preferred planting season. Landscape plants installed in March, April, and May benefit from generous rains and the long growing season that stretches ahead. But more often than not, many regions receive too much precipitation that makes planting difficult, especially on poorly drained sites. Furthermore, the sudden onset of hot, dry weather that typically displaces an often too-short spring can injure tender new plantings. Because of these difficulties, plant trees and shrubs during the period from mid-August to mid-October (zone 5 & 6). During this time, moderate and relatively stable air temperatures prevail, and soil temperatures and moisture levels are usually in a range that promote rapid root development. If you wait too long into the fall season (November - December) to plant, you run the risk of poor root growth and increased failure rate. Conifers, in fact, need a slightly earlier start than hardwoods, preferring the warmer soil temperatures of the summer to early fall. Some other slow- to-establish species are best planted in spring. These include: Trees for Spring Planting
In general, install plants with shallow, fibrous root systems in the fall rather than those with fewer, larger roots. Trees that can be successfully planted in the fall include: Trees for Fall Planting
Most deciduous shrubs can easily be planted in fall, except for two types: broadleaved evergreens such as rhododendrons and narrow-leafed evergreens such as yews. Both prefer spring planting. Nurseries sell trees and shrubs in many forms—bare root, container-grown, balled and burlapped, or dug by tree spade. Transplanting can be successful with all forms. Always put extra effort into the planting process to ensure a good start for your plant. The faster the root system is re-established, the better the chances for survival, and the more rapidly your new tree or shrub will grow. Before planting anything this fall, do some soul searching and ask yourself these questions: What do I want from this tree? (fall color, flowers, shade, fast growth, etc.)
Bulbs September and October are the best months for planting bulbs. This will allow ample time for the bulbs to become well rooted before the ground freezes. Bulbs planted after October may not have time to root adequately and therefore may not flower uniformly in the spring. Freezing and thawing during the winter may also push an unrooted bulb out of the ground. Plant the bulbs at a depth consistent with the level indicated on the bulb’s directions. As a general rule, this depth is four times the height of the bulb between the soil surface and the tip of the bulb. Make sure to plant the bulbs with the growing tip up. After the ground freezes, cover the bed with a 3-inch mulch to prevent alternate freezing and thawing that breaks roots and damages bulbs. When purchasing bulbs, be attentive to size. There is a direct correlation between the size of a bulb and the size of the flower grown from that bulb. For more details on planting bulbs visit Colorado State University Extension website. 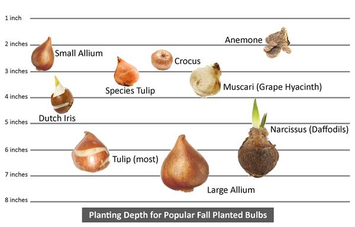 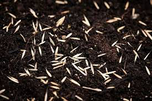 Lawns Most of the turf grass grown in Zone 5/6 lawns is “cool season,” including Kentucky bluegrass (Poa pratensis), perennial ryegrass (Loliam perenne), and fine fescues (Festucaspp.) Because these grasses grow best in cool weather, late summer to early fall is an ideal time to plant a new lawn, patch bare areas, or overseed an existing lawn. Grass seed must receive regular irrigation, especially until it begins to germinate. This is more likely to happen naturally in fall rather than in spring, when the new grass must withstand hot summer days. When purchasing, you may find grass seed embedded in what looks like dryer lint. The premise is that this will hold water when the seed is planted and watered. Though this may seem like a good idea, the best practice for getting grass seed to sprout is by making sure it has good contact with the soil. Loosening the top of soil before planting or raking the seed in will achieve this. Newly planted seed may be mulched with a light layer of straw. 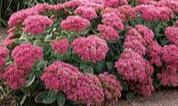 Perennials Why should spring get all the glory? While you might not think of fall as a time to get outside and plant new perennials, it actually presents a golden opportunity to do just that. Not only is it bargain time for many perennials at the garden store, the growing conditions are perfect for establishing roots. In autumn, the garden’s peak is fresh in your mind, so it’s easy to remember where you need to add some pizzazz. Remember that dead spot you noticed in midsummer? How about the garden bed that needs a splash of yellow or blue? Now is the time to address those areas. In Zones 6 and 7, the cool-down period starts around the end of September, about six weeks before the first fall frost. This is the ideal time to start your fall planting. In Zones 3 to 5, you’ll want to plant earlier if you can. And of course, Zones 8 to 11 can pretty much plant year-round without a problem. (Lucky!) Still, you want to get an early start to give roots time to get established. Wait until the soil freezes hard, then spread a few inches of mulch around your perennials—not to prevent soil from freezing, but to keep it from thawing. Roots that aren’t solidly anchored can “frost heave” out of the soil when the ground freezes and thaws, putting the plant in danger of getting killed by cold. Once mulch is on, you’re all set. Even if a few of your new perennials don’t make it, you’re probably still coming out ahead. Fall planting gives you a big jump on spring gardening, so you have more time in the busy season. Below are some perennials that do well when planted in the fall. Perennials for Fall Planting
The most common plant problem is not an insect or a diseases—it is us. We do a great job of killing plants we obviously intended to grow. Please use these resources to incorporate important cultural practices that impact the survivability of newly installed plants. There are many websites that offer pictures and detailed fall planting instructions. Good resources usually include an arboretum or your state’s cooperative extension. Here are a few websites we like: Purdue, Penn State, Virginia Tech 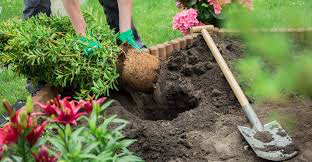 We hope you take advantage of the cooler temperatures to do some fall planting. The array of plants available extends far beyond chrysanthenums, and very well may be discounted for the end of the season. Happy autumn planting!
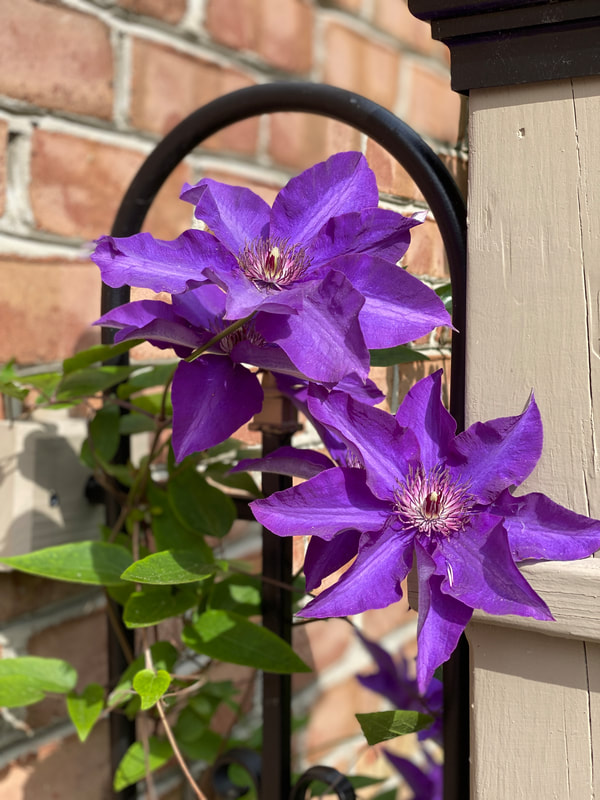
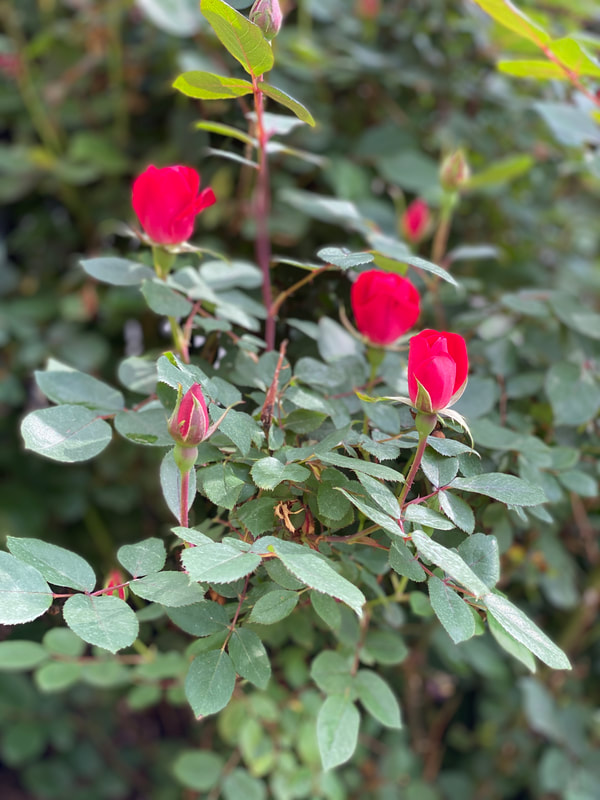
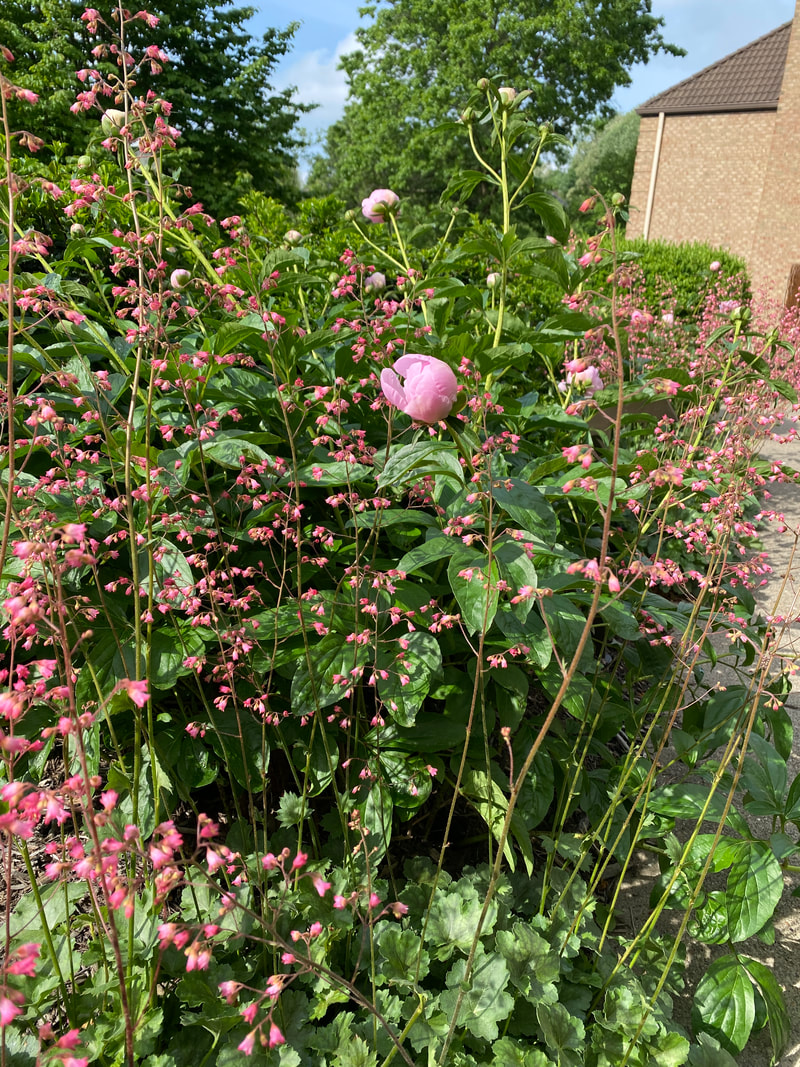
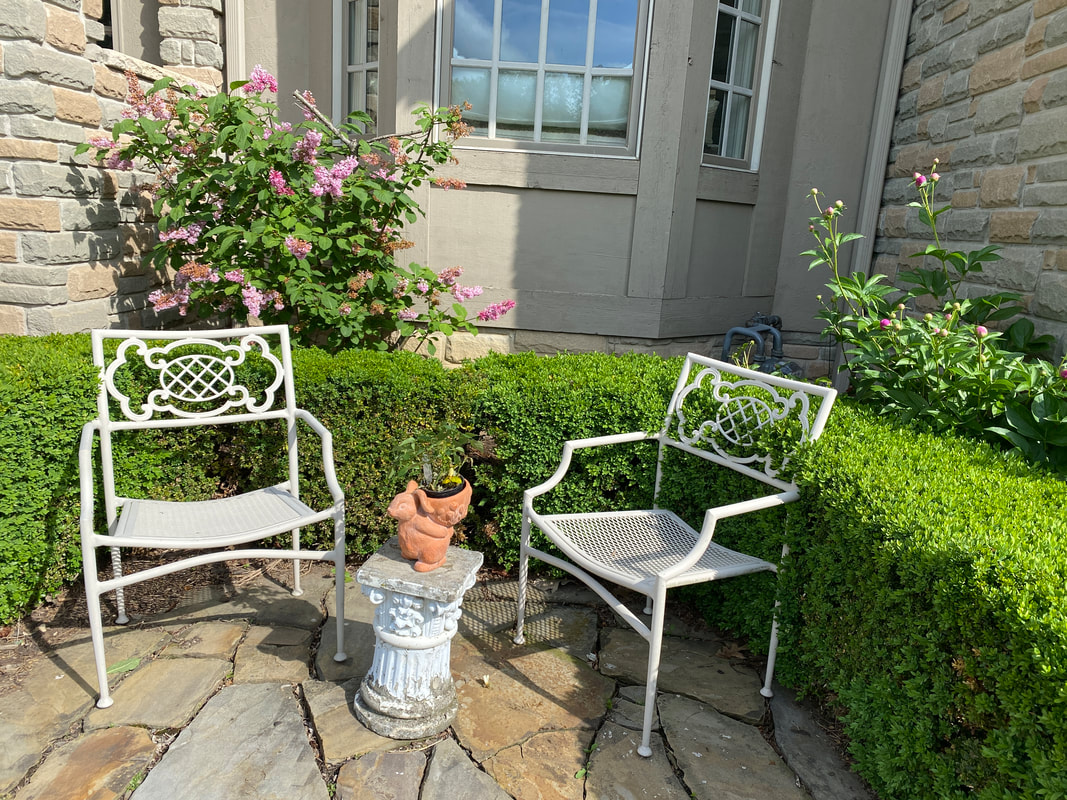
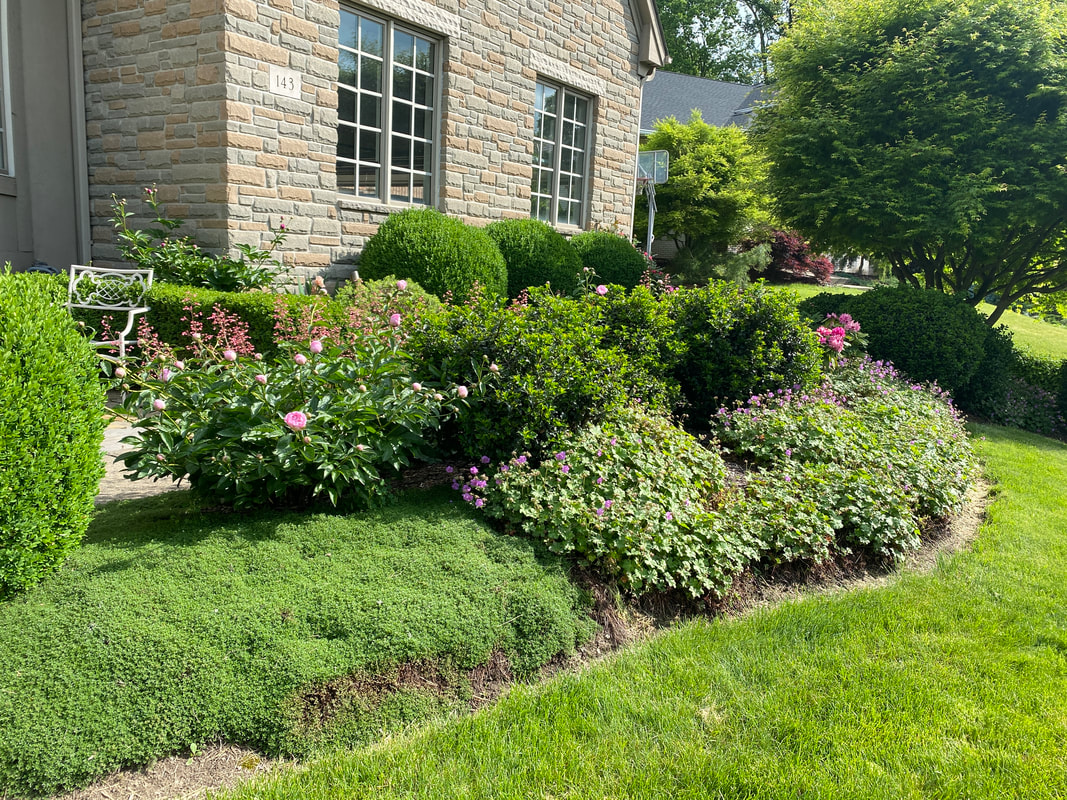
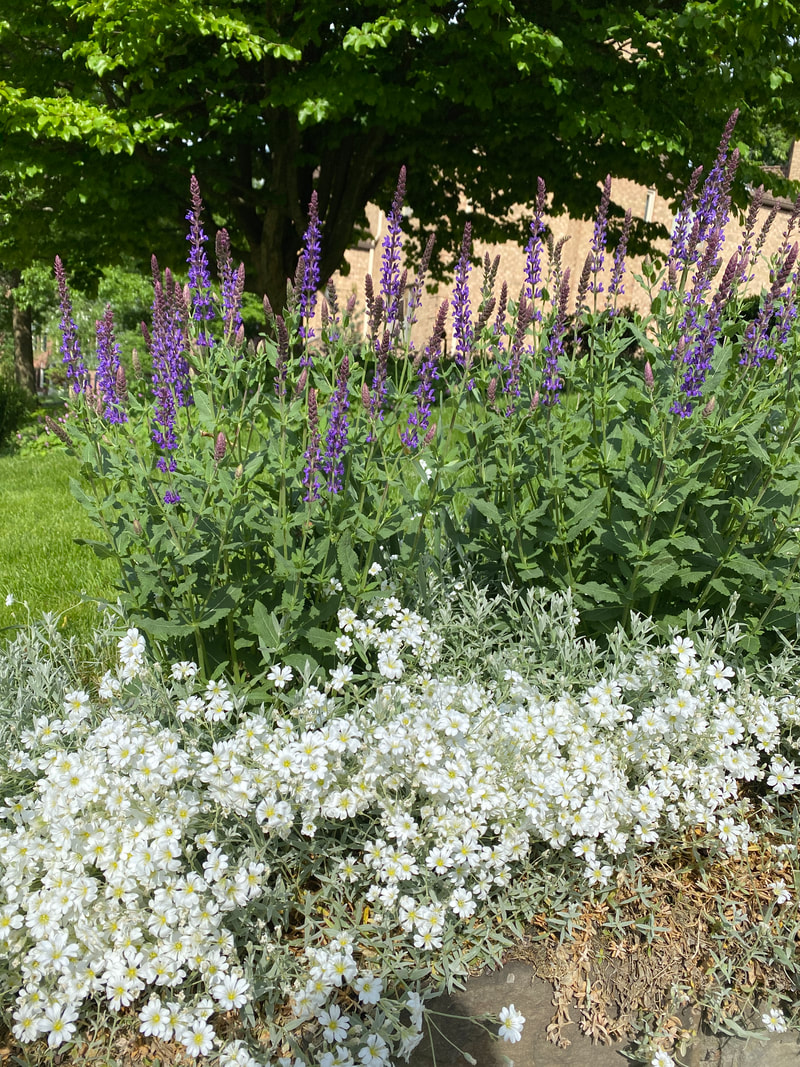
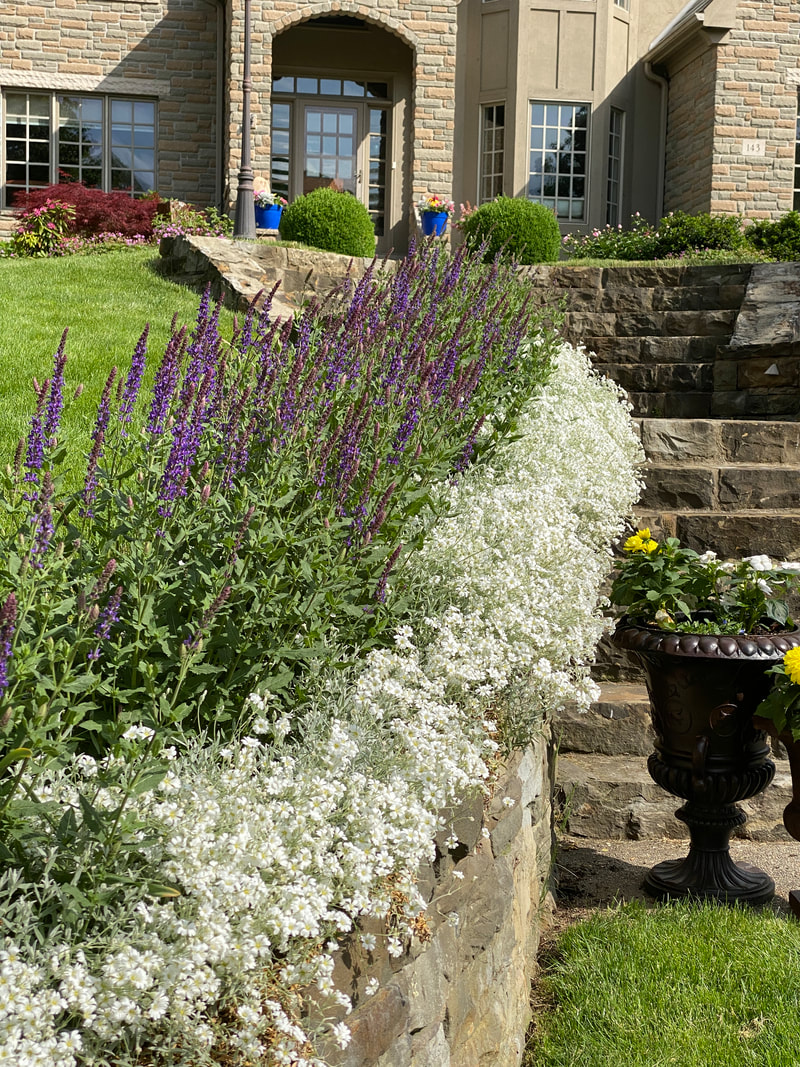
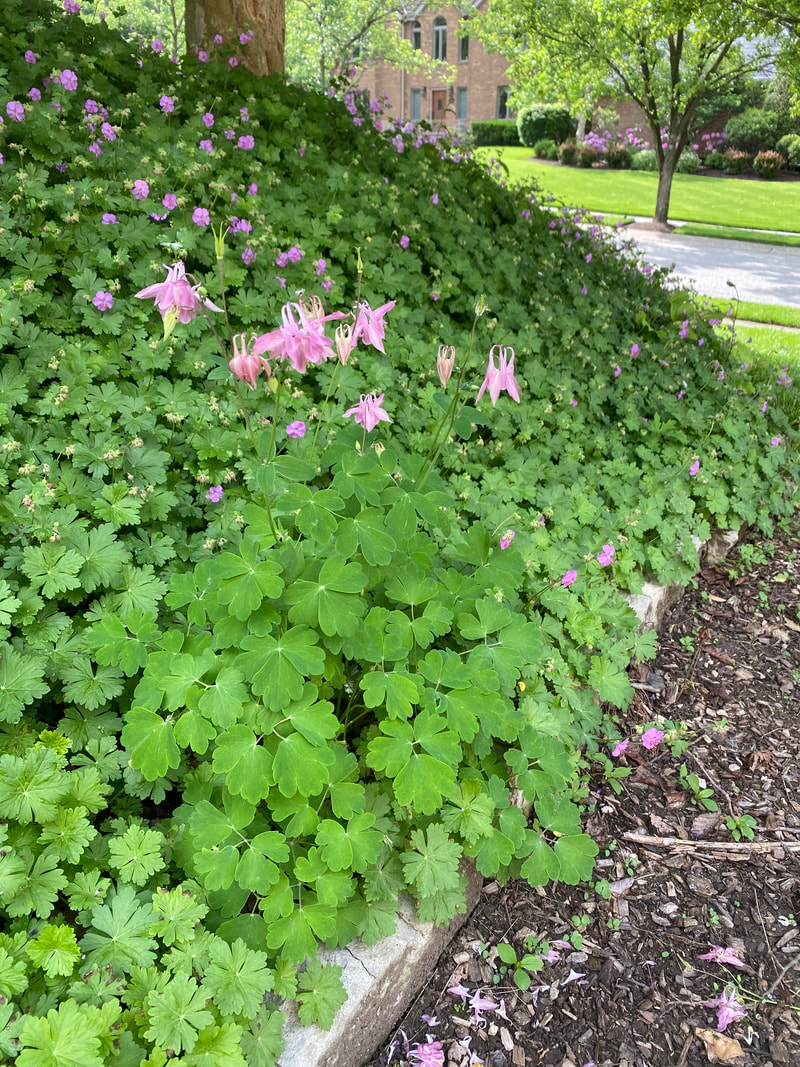
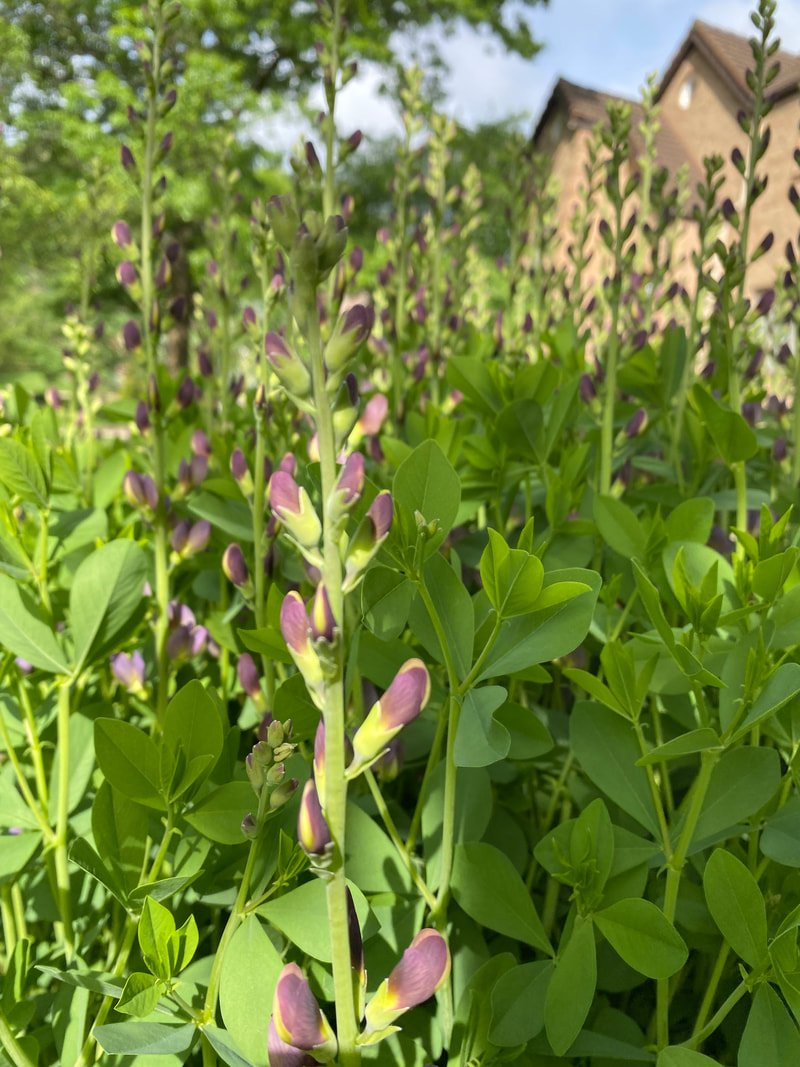
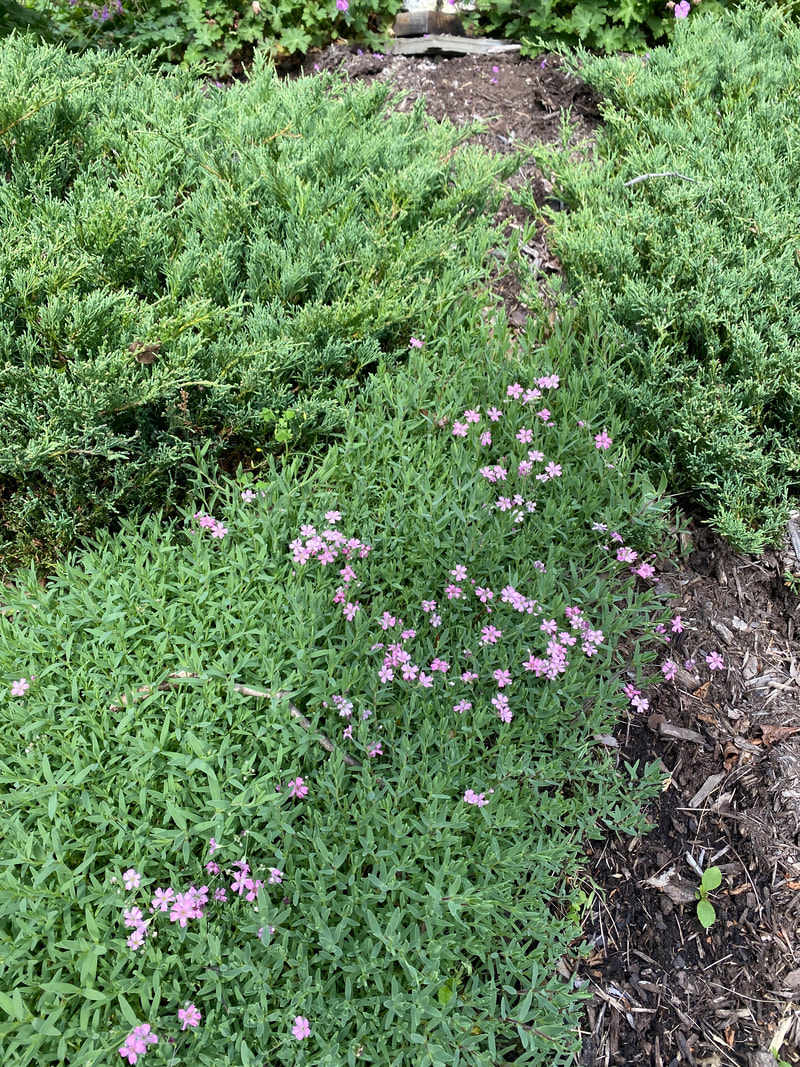
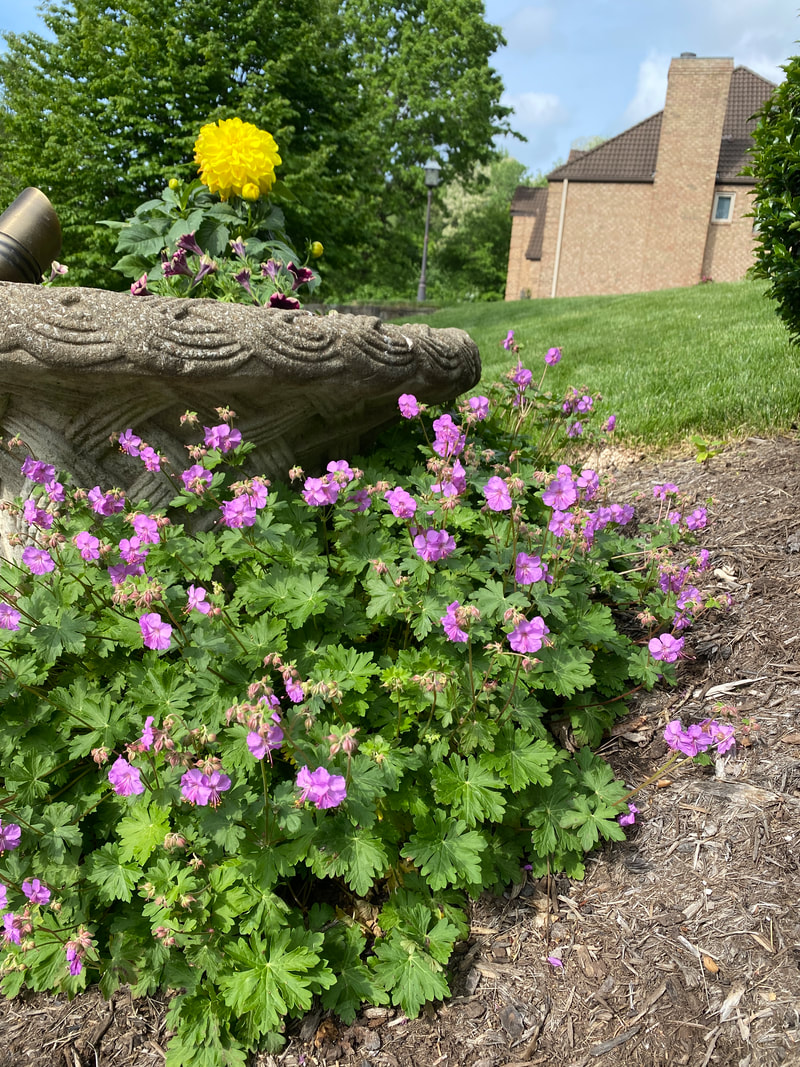
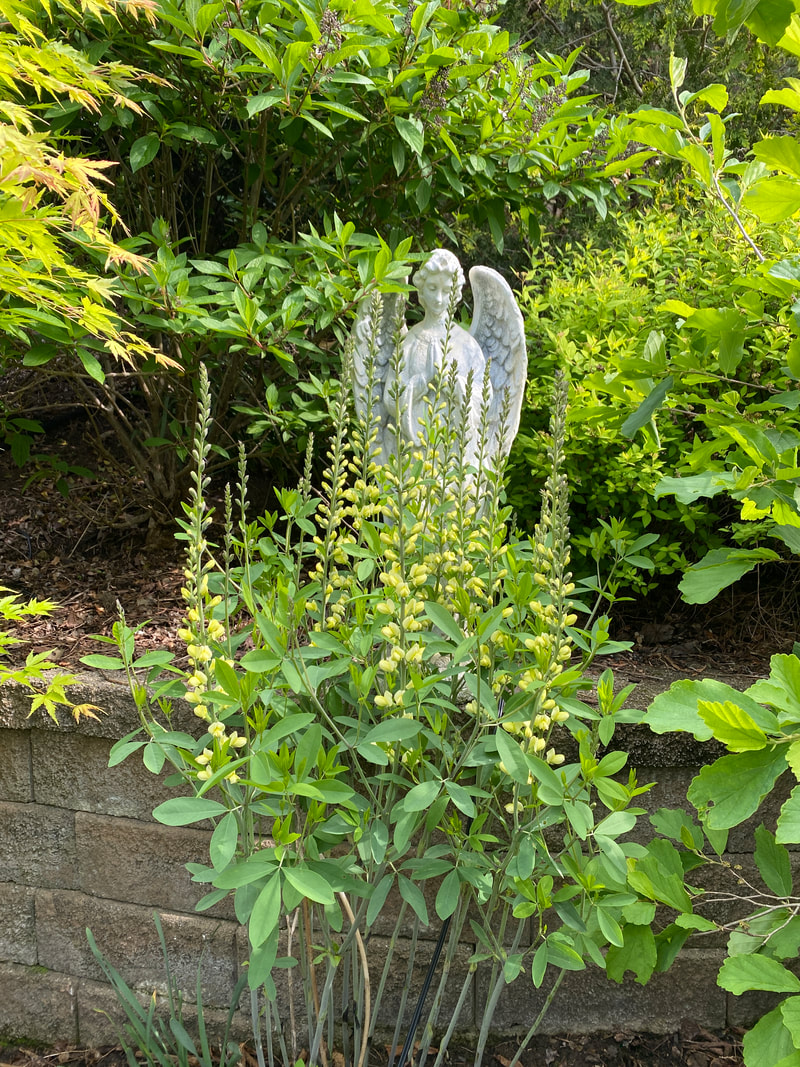
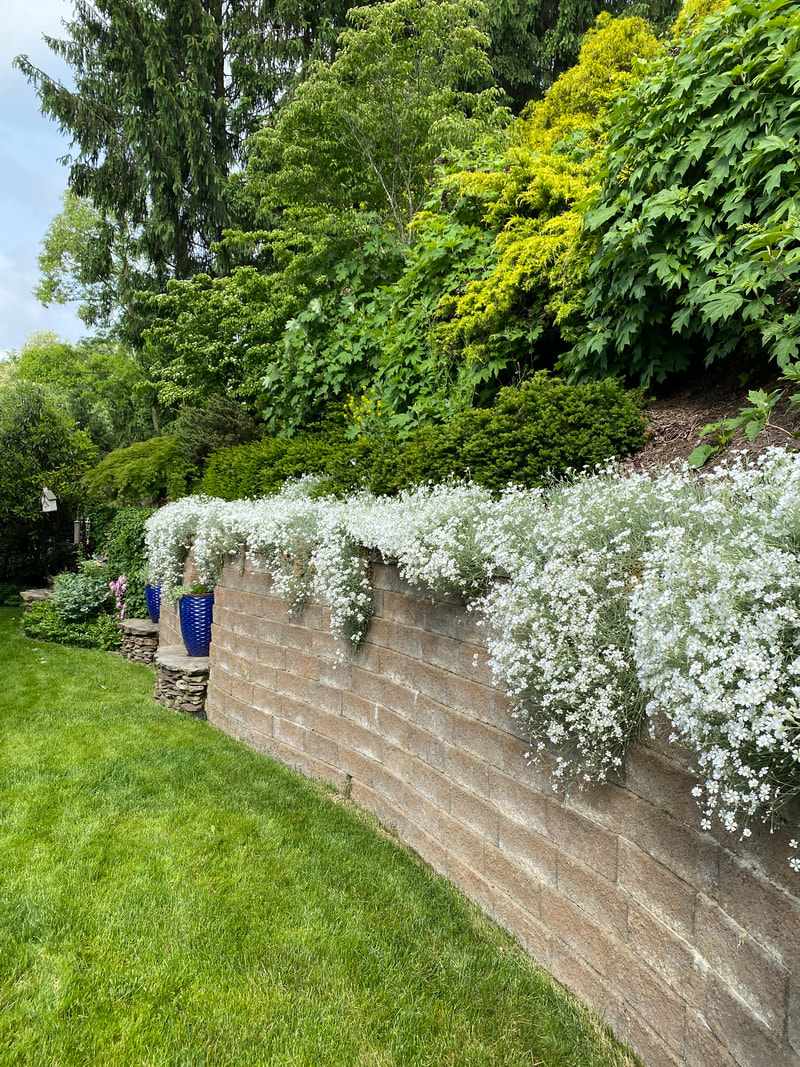
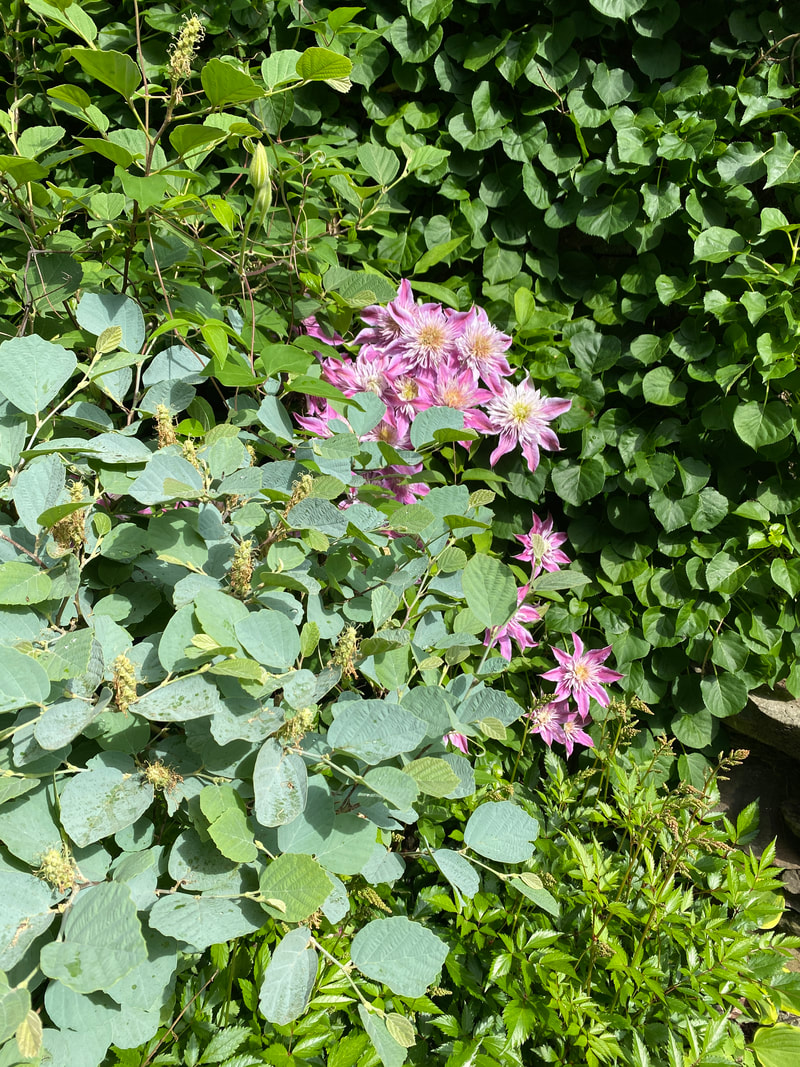
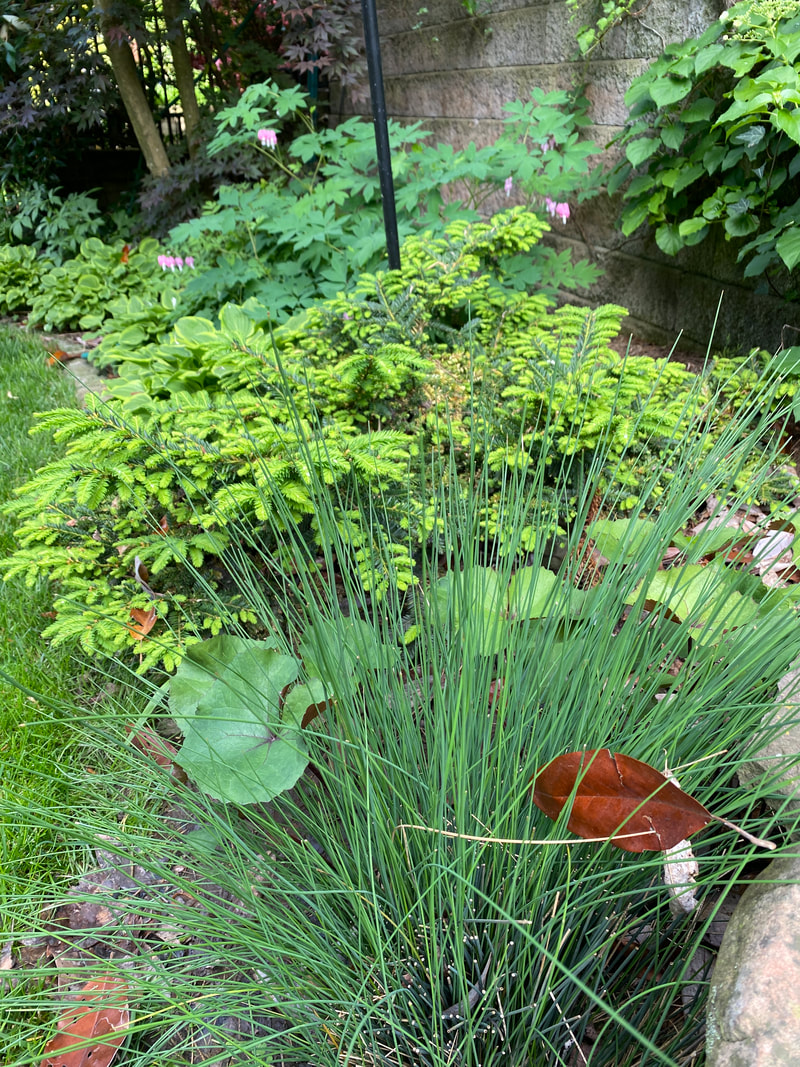
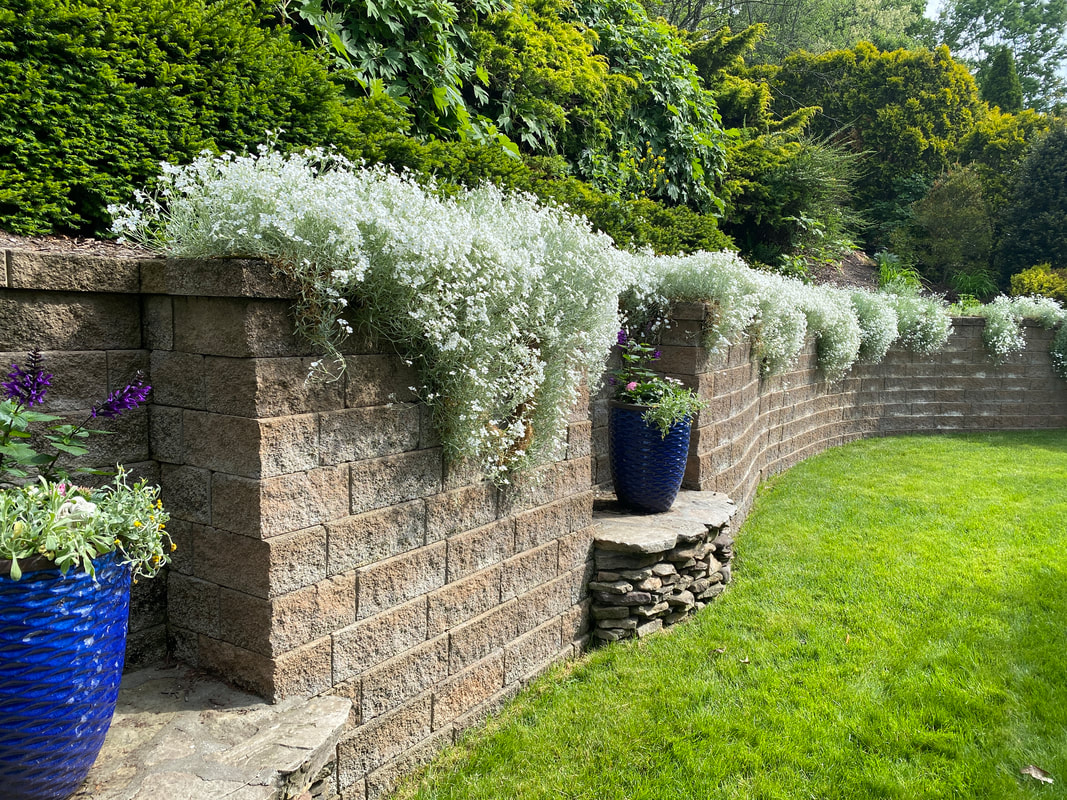
Tips for Riding Out this Season's Sticker Shock....Bonus section: pictures of my spring garden5/23/2022 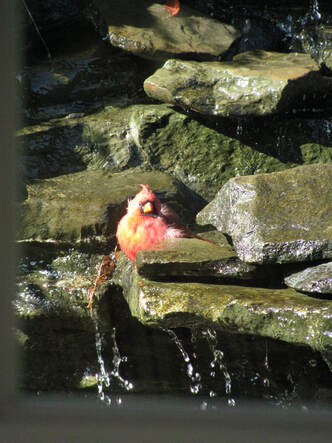 Cardinal enjoying my waterfall A full spring schedule and recent home projects opened my eyes to the astronomical increases in the cost of landscape installation, construction, and green material (plants, trees, and sod.) Now that warmer temps make it safe to plant, you've surely noticed how the cost of materials has skyrocketed. The pre- Covid cost of a 2x4 was about $2.40; now it is close to $11. Professionals up and down the supply chain are passing on the their increased operating expenses to the consumer. Items impacting operational budgets include vehicle maintenance, truck tires, labor, gas and plant material. Last year the pain of isolation was remedied by an abundance of outdoor home projects. Consequently, the supply of tall and larger plants was exhausted. Plants aren't widgets. They take time to grow, and the result is felt at the the landscape centers with limited supply and increased cost of taller shrubs and trees. For example, a pre-pandemic five foot tall evergreen cost around $175 and now it it is $350 or greater. What can you do to ease the financial pain? Plan now, Plant later Take this year to plan for the future and stage your renovation over a three-year period. Plant structural and evergreen plants first. Then add seasonal interest plants over the course of next few years. Shop sales in the fall. Planning prevents 'splurge plantings' that often result in dead plants and wasted money. Taking your time to think about your plants allows thoughtful consideration of your growing conditions and choosing the right specimen for your space. Remember this motto: Right Plant, Right Spot. Plant Small If your plan includes fast-growing shrubs like weigela, viburnum, spirea and junipers, try purchasing young, small plants. If your project includes a large hillside or mass planting, consider purchasing 2-year old saplings. For example, you can purchase young junipers at Musser Forests for $2.05 ea. (quantities of 25 or more) rather than larger plants at $40+. Buy and plant a few more young plants than you need because inevitably, some will die. The disadvantage to purchasing smaller is keeping them watered due to the small root balls that can quickly dry out. I usually recommend installing a soaker hose for large areas. Shop Sales By mid-June many nurseries are trying to unload their annuals. Purchase a few select annuals now for immediate color, but fill empty bed and container spaces by shopping sales in late June and early July. The plants should flower through September. Maintain Instead of planting new things this year, focus on maintaining what you already have. Much of my business is the result of home gardens that haven't been maintained. Weeds have overgrown through ground covers so that the entire areas must be killed and replanted. Shrubs haven't been pruned and are past the point of salvaging. A yearly or bi-annual maintenance plan will save you thousands in replacement costs. Give your beds a clean natural edge, keep up with the weeds, use corn gluten as a weed seed pre-emergent, and skip the mulch this year. Bonus: A view into my spring garden. To ease my garden costs, I have planted seeds, bare root roses and shopped online sales. Rather than working on any big projects this year (I need to replace some trees declining boxwood), I'm focusing on the fruits of my labor and enjoying my outdoor space. After a long, dreary winter, spring blooms bring me much joy. And I enjoy experimenting with contrasting textures and colors....hard and delicate, square and round, spiky and soft, yellow and green. I have a small yard so each plant must have purpose. I am ruthless in removing plants that don't live up to my expectations. Roses and climbing hydrangea serve as trellises to support my clematis. Ground covers like thyme, geranium biokovo, trailing baby's breath, and lamium add seasonal color, reduce weeds and significantly lessen my mulch costs. I deadhead the salvia and coral bells to extend bloom times. Feeding my Knock Out roses rewards me with waves of blooms all summer. Deutzias stabilize a hill and the baptisia provide loads of indoor bouquets and garden structure. Peonies and lilacs are 'one and done' plants (short bloom time and look "homely" rest of the season). I rarely add them to my clients' designs, but they are a treat and I must indulge by sharing my valuable garden space with these single season bloomers. Snow-in-Summer softens the the hard edges of the walls in my back yard. The gray winter foliage breaks up the stark precast stones which are viewed from every room within my first floor. The crazy spring with its unusually warm and then plummeting temps caused many of my cutting garden perennials to die this year....red hot poker, asters, and daisies just never showed up to the party this spring. So I appreciate the years they bloomed and get excited to try something new. To take their place, I planted native wildflower seeds and 4 bare root roses. I'll keep you posted on how this experiment works. Despite the weeds, deer, rabbits, ground hogs, and loss of plants, the beauty of each seasons' colors and textures brings much joy. Happy Spring and Happy Planting, Gwen |
Thank you for finding us! Holly and I have collaborated to bring you informative, fun, and seasonal garden inspiration blogs.
Subscribe to receive our blogs on the 1st and 15th of the month--Gwen Follow my landscape & garden design Pinterest Page to see more pics, inspiration and Gwen's home garden journey!

Gwen
AuthorsGwen Wisniewski: Landscape and Garden Designer. Contact me. Let me help you integrate these garden inspirations. Choose the links below to find out more about my landscape design service or to make an appointment. 
Holly
|


 RSS Feed